Hi! I’m Blair Gilbert, a.k.a.
MR. HARDWARE
As a third-generation hardware store owner, licensed builder, and finish carpenter, my mission is to help you “do it right the first time!” On this site, I share expert home and yard DIY advice in over 250 articles and videos. Feel free to dive in!


Latest Articles
- Toto Toilet Flappers – Red or Blue – Replacement Repair Fix (4/22/2024) by Blair Gilbert
To replace thr ToTo flapper:
https://youtu.be/EkFT8M3zNvUReplacing the flapper on a TOTO toilet, regardless of the red or blue color, is a fairly straightforward process. Here’s a general guide to get you started:
Tools you’ll need:
- Replacement flapper (ideally a TOTO universal flapper which works for most models)
- Adjustable wrench (optional, in case the flapper arm needs tightening)
Steps:
- Turn off the water supply: Locate the shut-off valve behind the toilet and turn it clockwise until it stops.
- Flush the toilet: This will drain most of the water from the tank, making it easier to work on the flapper.
- Remove the old flapper:
- Unhook the chain from the flush lever by gently pinching the clip holding it and releasing the hook.
- The flapper might be hooked onto two little pegs inside the tank. Simply lift it out carefully.
- Install the new flapper:
- If using a TOTO universal flapper, you might need to adjust it based on your toilet model. Refer to the instructions on the back of the package for chain length, lever hole position, and any flapper adjustments specific to your toilet.
- Otherwise, simply place the new flapper onto the pegs in the tank.
- Reconnect the chain to the flush lever by hooking it onto the desired link according to the instructions (or with minimal slack if no instructions are available). You might need to adjust the chain length by attaching it to a different link.
- Turn on the water supply: Slowly turn the valve counter-clockwise until it opens fully.
- Check for leaks: Observe the tank as it fills. Ensure there are no leaks around the flapper or at the connection points. You might need to tighten the flapper arm with the adjustable wrench if there’s a leak around the flapper itself.
- Test the flush: Press the flush lever and observe if the toilet flushes properly.
More New Articles
- 6 Kohler Toilet Flappers – 3″, Rubber & Plastic Bar, Ball, Shark Fin, Flat (4/1/2024) - Here are 6 Kohler Toilet Flappers. The 3 inch, Rubber & Plastic Bar, Ball, Shark Fin or Flat flappers for Kohler toilets may be hard to find. https://youtu.be/txwLZ3mubH4 Replacing a Kohler toilet flapper… ...read more
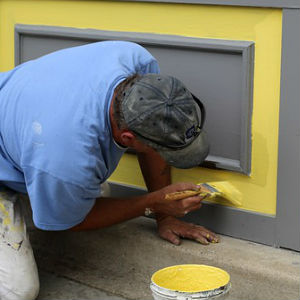
- Waterproof Outdoors with Rubberized Roof Coating, Seawall Sealant for Mobile Home (3/11/2024) - I had concrete poured against a steel seawall and wanted to seal the joint to prevent water from seeping between the two and causing the steel to rust, expand and totally ruin my… ...read more
- Locate Underground Water Pipe, Line, Hose – divining Rod, Witching, Dowser (2/19/2024) - Witching, or dowsing, or diving rods, are 2 pieces, some forked sticks or metal hangers, used to search for underground water, minerals, and lost objects. It's an old art thought to be thousands… ...read more
- Save Old Latex Paint Brushes – Clean with Acetone – Even After Years (1/29/2024) - Save old, dried latex paint brushes using common acetone solvent to remove dried latex paint from brushes. But too much paint for too long could harm the bristles. https://youtu.be/2PmZmpuPtnU Use a non-plastic container… ...read more
- Simple Bucket Test for Toilet Clog, or Just Slow, Half Flush Issues – Tips (1/8/2024) - To pour water into a toilet to check for blockage or clearance, follow these steps: https://youtu.be/yDASMxz5yGo Fill a bucket with hot water. Do not use boiling water, as this can damage the toilet… ...read more